Table of Contents
So, you’ve finally made the leap and bought an electric vehicle. Congrats! But wait, have you thought about how you’re going to charge it efficiently? That’s where scheduled charging comes into play. It helps you to take advantage of off peak charging and get your EV ready before leaving home.
Scheduled charging can be a daunting process with so many brands providing various options with their unique interfaces. This blog post will provide guidance on how to set up scheduled charging for various EV brands and hopefully provide more clarity to make charging convenient and easy.
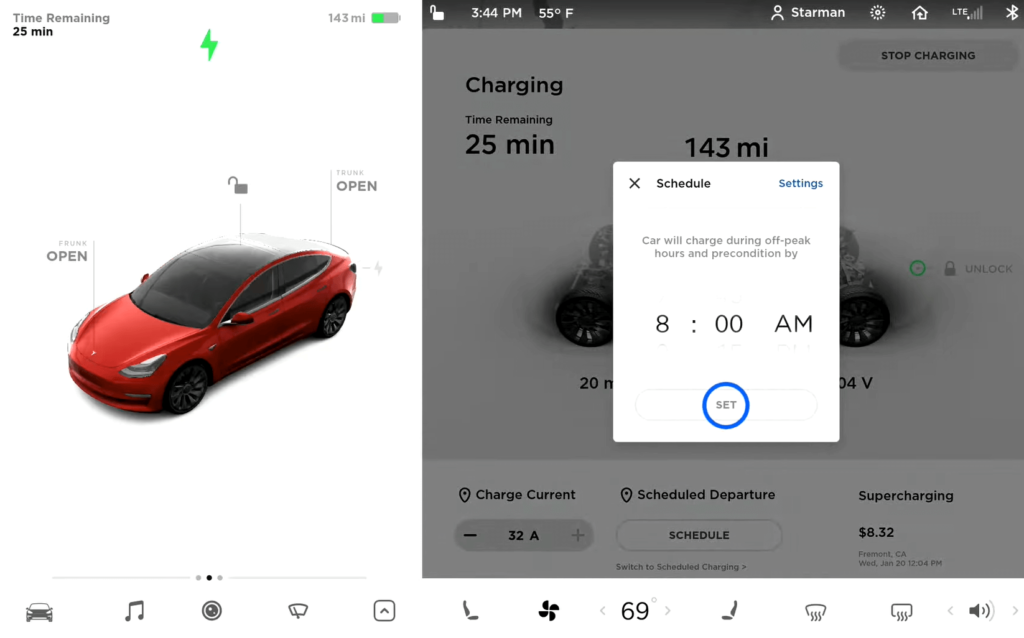
Tesla Scheduled Charging
Go to the setting menu on the car, choose Controls > Charging > Switch to Scheduled Charging/Scheduled Departure when your Tesla is in park.
Note that scheduled charging means “When you would like the charging to start”, while scheduled departure means “When you would like charging to be complete”.
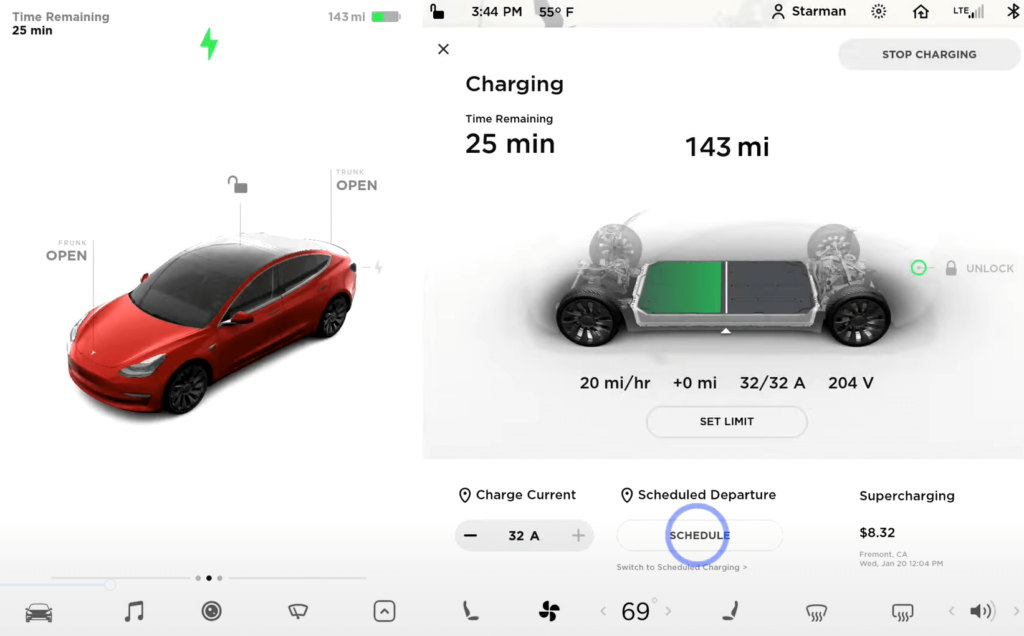
Adjust the time for scheduled charging to the specific time you would like your Tesla to start charging and click set.
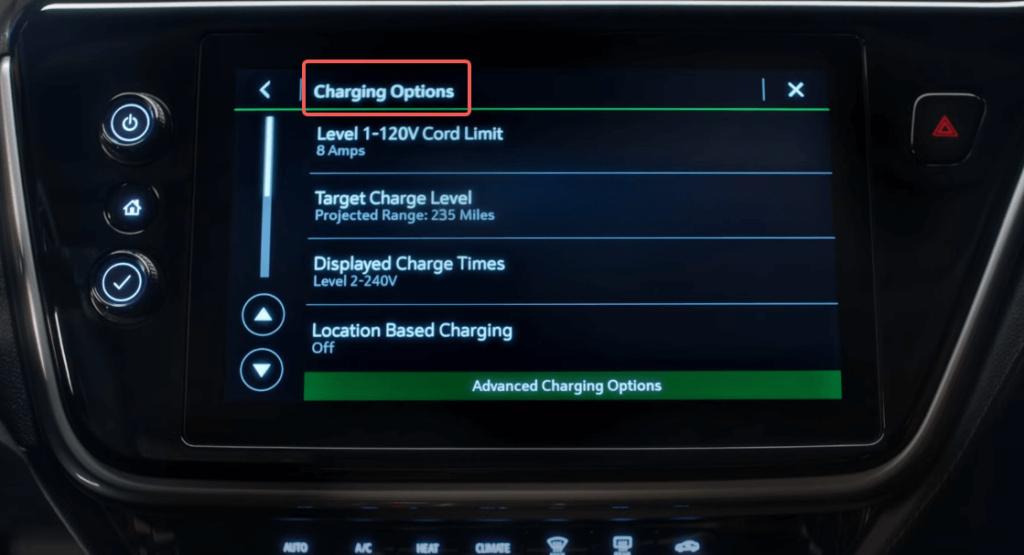
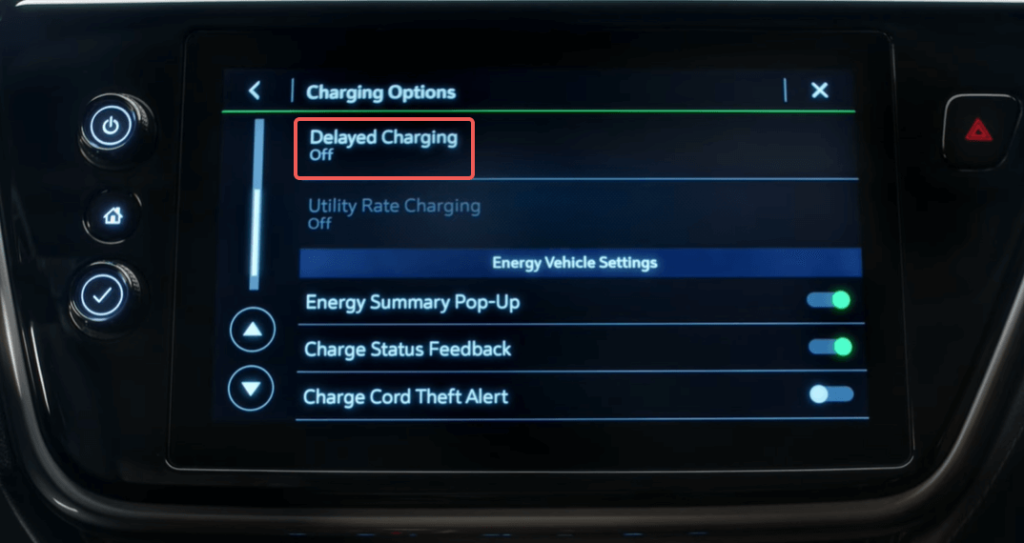
Chevrolet EV Scheduled Charging
Go to Charging Options and scroll down the menu to Delayed Charging. Turn on Delayed Charging and adjust the schedule to your desired time.
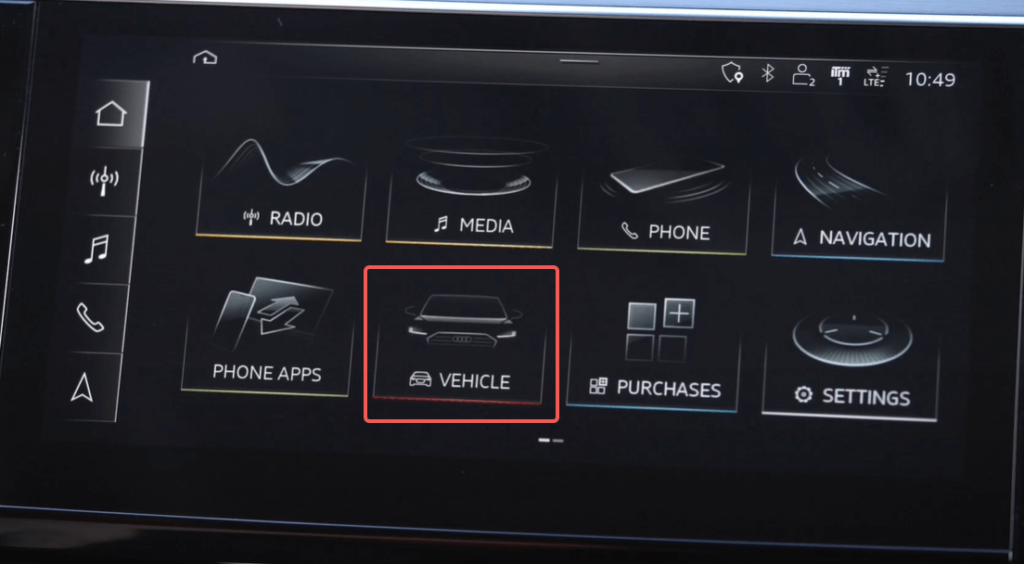
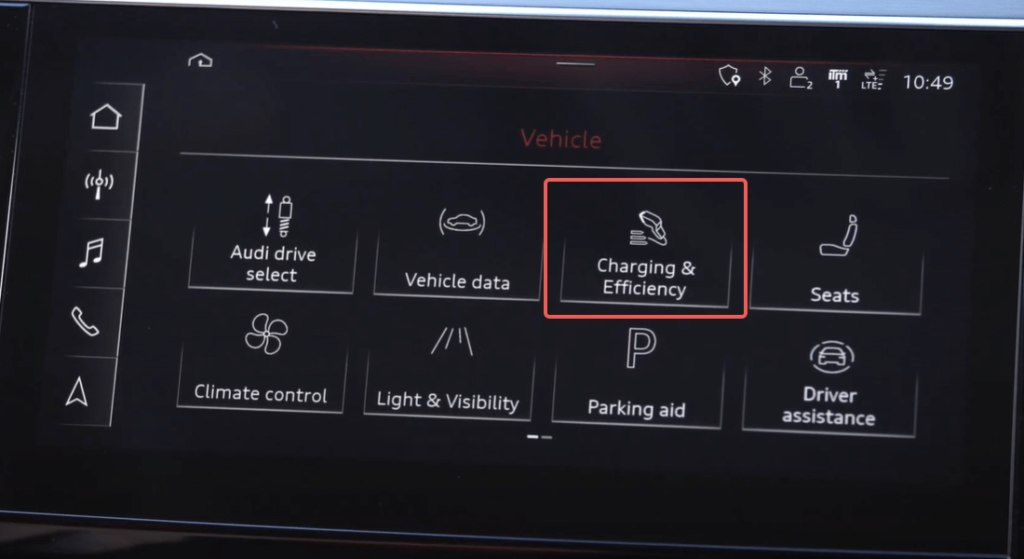
Audi EV Scheduled Charging
Go to Vehicle > Charging & Efficiency > Charging.
From there, select which days of the week you would like to turn on scheduled charging, then click next. Adjust the departure time to which you would like your EV to have complete charging, and click OK to save.
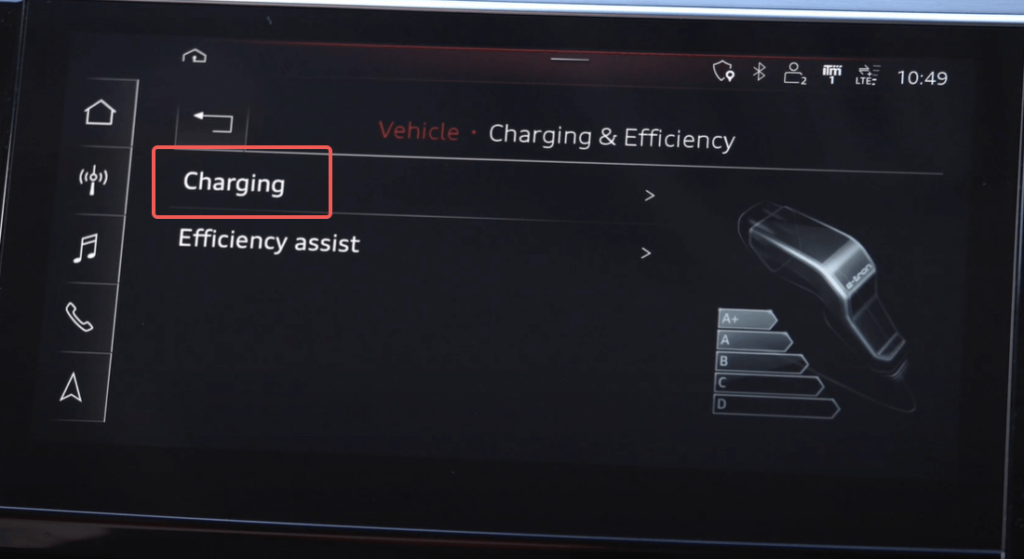
Your Audi EV will be done charging and ready to go at the selected time.
BMW EV Scheduled Charging
There are two main ways to set your BMW EV or BMW plug-in hybrid, to schedule charge at off peak hours. The easiest way is to use My BMW App, but you can use any of the iDrive systems to setup scheduled charging as well.
- Open the app and select Charge & Climate settings.
- Under Charging Mode, change from Charge Immediately to Charge mode Time slot.
- Scroll to select your start time and stop time of when you prefer to charge.
- Once times are set click Update in my BMW.
- Select a departure time will populate and select the time you wish to depart.
Setting a departure time may seem unnecessary but it allows your BMW to know when you plan to drive it and ensures that the car is ready when you are ready to leave. Setting a departure time is required for charging in a time slot as well as a precondition for departure.
Others
Ford Mustang Mach-E
Charging your Mustang Mach-E can be managed through your FordPass App.
- Open the FordPass App.
- Press the vehicle icon on the lower left.
- Press Manage EV.
- Press Manage Charging.
- Press Charge Settings.
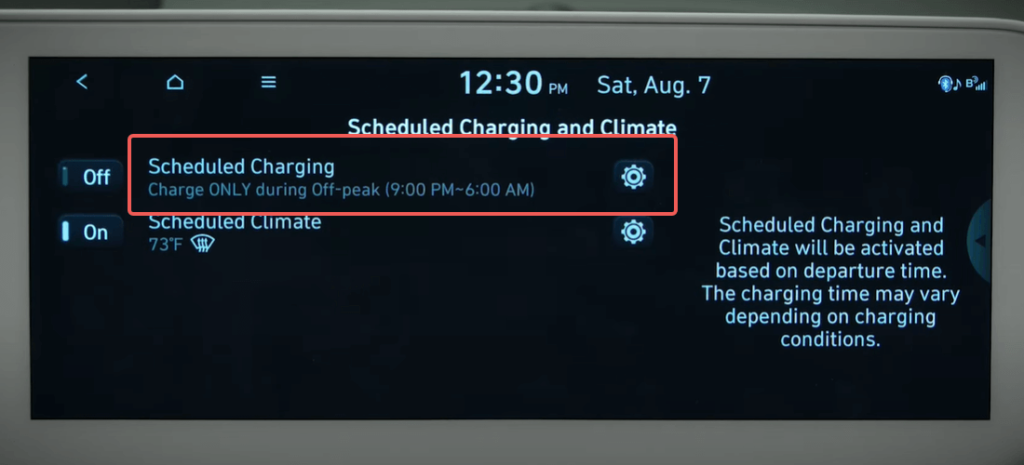
Hyundai IONIQ 5 & Kia EV6
Hyundai and Kia use identical setting interfaces and can be easily managed once the scheduled charging option is turned on.
First, click EV option.
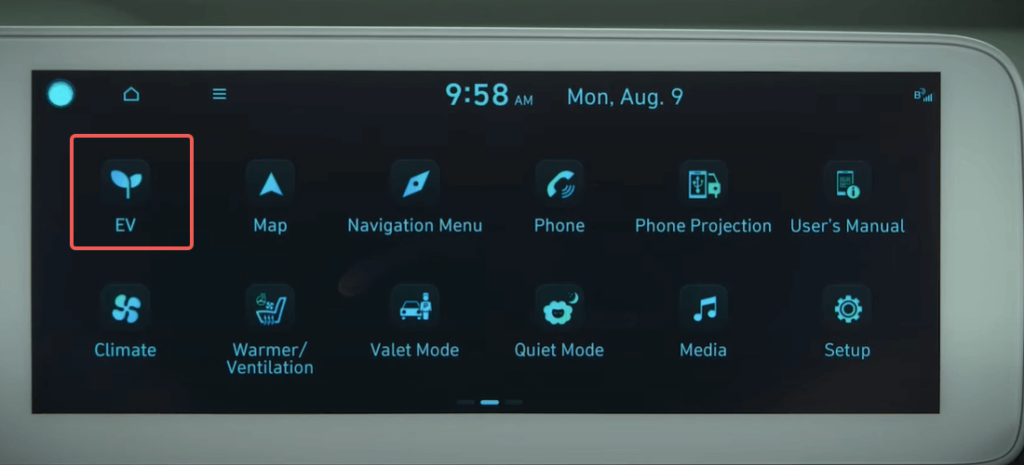
Enable the next day departure setting to activate the scheduled charging option. Scheduled charging cannot be used if the next day departure setting is not on.
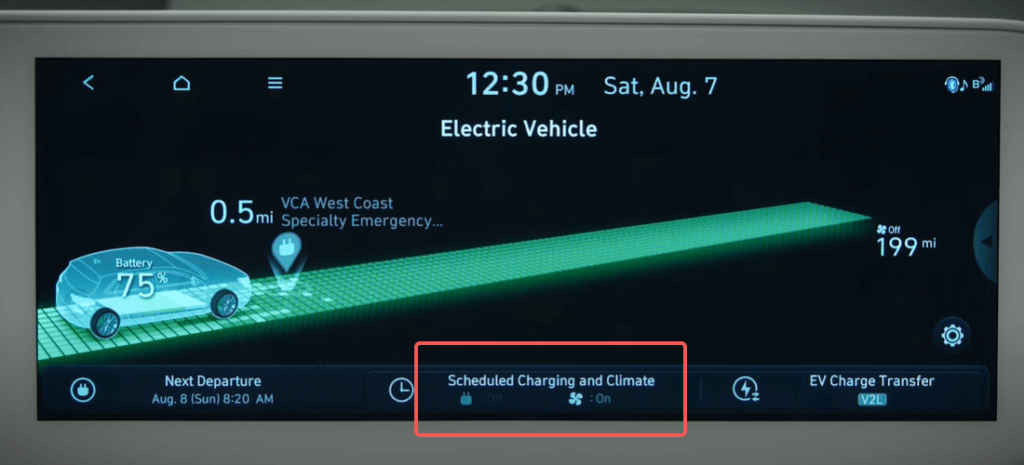
Adjust the schedule charging setting to your desired day and time to start and end charging and click OK. Remember to turn scheduled charging on once times are selected.
Volkswagen ID.4
To get started, your Volkswagen ID.4 needs to be in a scheduled charging location.
Your vehicle saves these profile preferences to the GPS location.
To create a saved location, on the ID.4 touch screen, tap charging and locations, then tap add current position as a charging location. Type in the name of the location and continue. Departure based time profiles will populate.
Tap on one of the rows to customize. The top right drop down allows you to choose repeat for a multi-day profile or one time for a single day of the week profile. Select the days and time you wish to depart and click set departure time on the top left. Select the times you wish to depart and click the back arrow to save.
Additional options of scheduled charging are available if you scroll down. Direct schedule charging to set a minimum amount of charge for the location and a charge to limit for the specific location. Scroll down further to set the times for charging by tapping a row and inputting the desired start and stop times. Click the back arrow button to save. Check off the profile of the times you wish to use.